JConcepts
F2 - 1/8th Truck Body-MBX8T-RC8T3.2-8ight-XT
F2 - 1/8th Truck Body-MBX8T-RC8T3.2-8ight-XT
Impossible de charger la disponibilité du service de retrait
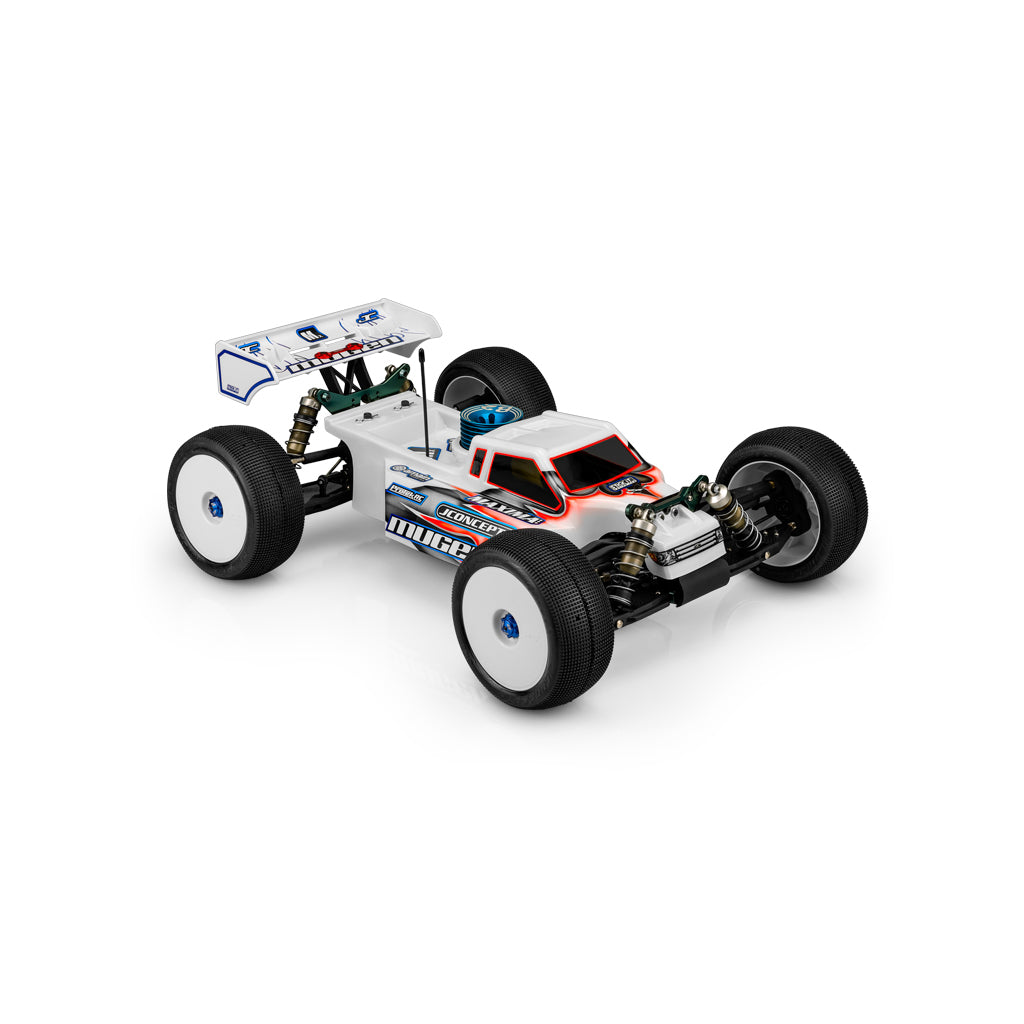
JConcepts unveiled a new body during the 2021 ROAR Fuel Nationals for the 1/8th truck division. The F2 body was constructed to perform at the highest level using the latest trend of reducing surface area above the shock tower line, reducing the overall weight while maintaining a tight silhouette. No stranger to Truggy bodies, the JConcepts team has developed a successful line of bodies with the Punisher and Finnisher designs, and each has excelled and peaked during ROAR championship events. For the 2021 event, the team focused on a behind tower concept body to fit 5 chassis configurations including the Mugen, Team Associated, TLR, HB, and Tekno.
What stands out on the JConcepts body is the raised nose that planes off the front shock tower. This design and styling were chosen over the buggy style mount to provide a better look, a cleaner and more durable fit and a better overall flow aerodynamically. To mount the F2 body, a carbon fiber adaptor is needed along with the Team Associated #81447 body mounts or Mugen #MUGE2148 (for MBX8T) to place the front of the body in correct position. Each truck has a specific adaptor produced in carbon fiber which bolts directly to the stock tower and once adding the (not included) body mount, provides a custom fit and beautiful finish.
The F2 name arrived after the team decided on using an existing style from the 1/10th stadium truck body already in the JConcepts line-up. The narrow shape, double upper railed cab with inner louvers are undeniable traits carried over to the new truggy performance body. The V-shape off the back of the cab is JConcepts fit, function, and styling from the get-go with a blend to recessed bed area for a low-slung base shape. A strategically placed spoiler outlet in the bed transitions to the mounting area.
The nose cone was prototyped to attach on multiple trucks and ultimately fixed in a protective and performance position. Complete the nose piece with included decal to give the truggy ROAR required headlight and grille placement. The side-pods inspired by the Silencer and Finnisher shells cover a variety of electrical and pipe layouts while showing-off the huge chamfer made popular by the team at JConcepts. The symmetrical pods finish at the body shell’s main structure while the dual and recessed side-windows maintain its unique and low-profile posture and ride-height.
The JConcepts body includes overspray film on top of the body, window mask for quick paint and prep and detailed JConcepts decal sheet. The product is always backed by JConcepts customer service, support, and developed by professionals with style and authenticity.
JConcepts at the races –
The JConcepts team took on the ROAR Fuel Nationals and Ryan Maifield earned the TQ and victory in a stacked field at the highly competitive event held at LCRC Raceway in Oakland Mills, Pennsylvania. As the team only had 4 prototype shells available, the popularity and word of mouth grew large during the event creating a stir. Imposter body shells popped up after this event, however, JConcepts kept it on the track and in the results column. For the ROAR 1/8th E-Nationals held at SS Hobbies & Raceway in Tampa, Florida, it was once again, Ryan Maifield rising to the challenge with the F2 body, this time on the E-truck. The team racked up another TQ and overall 1st place making it two national titles in less than a months’ time.
Assembly notes –
To begin, install or mock-up the (not included) AE body mount #81447 or Mugen #MUGE2148 (for MBX8T) into the center position on the carbon fiber adaptor by using included hardware. Tighten the screw while allowing the mount to “notch” in to place to give the mount a vertical and stationary position. In some cases, depending on vehicle, the body mount may need to be completely installed to the adaptor first, due to hidden or closed-off screw locations. Once the mount is positioned, attach the carbon fiber adaptor to the shock tower using 3mm hardware and secured in to place with 3mm lock nuts.
Once the carbon fiber adaptor of choice is attached to the shock tower, review the instructions on body trimlines to accommodate the vehicle of choice. It is important to follow along to position body mount holes, perimeter cutlines and possible engine head cut-out and fuel tank openings to the appropriate vehicle. Once the carbon adaptor is in position and body is trimmed for the vehicle, the painting and detailing process can be completed in traditional fashion. #gojconcepts


